Wednesday, November 20, 2024

Bird Feeder Designs with Functional Features That Will Stand Out

Bird Feeder Designs with Functional Features That Will Stand Out

Beyond the simple act of providing food, bird feeders can transform your backyard into a vibrant avian sanctuary. But with countless designs available, how do you choose a feeder that's both functional and visually captivating? This article delves into the world of bird feeder design, showcasing functional features that will elevate your feeder from ordinary to extraordinary.

Beyond Aesthetics: Functionality First

A stunning bird feeder that fails to meet basic needs is a waste of space and resources. Prioritize functionality in your design, ensuring your feeder attracts birds and protects the food from elements and unwanted visitors. Here are some key functional aspects to consider:

Weather Resistance

Exposure to rain, snow, and sun can quickly ruin bird food. Choose materials that resist these elements. Metal, treated wood, and durable plastics are excellent choices. A sloped roof and strategically placed drainage holes can further protect the food.

Pest Control

Squirrels and other pesky critters can quickly deplete your bird food supply. Incorporate features that deter these unwanted guests. This could include:

  • Squirrel-proof feeders with cages or baffles.
  • Using hot pepper-based bird food.
  • Installing motion-activated sprinklers or deterrents.

Easy Cleaning and Refilling

Bird feeders require regular cleaning and refilling. Design your feeder with ease of access in mind. Choose a feeder with a removable tray or a top-loading design. These features make maintenance a breeze, keeping your feeder clean and healthy.

Unique and Eye-Catching Designs

Now that you've addressed functionality, it's time to inject some creativity and style. A unique design will make your feeder a focal point in your yard, attracting both birds and attention.

Natural Materials and Textures

Embrace the natural world by incorporating materials like reclaimed wood, woven vines, or repurposed branches. These elements not only add visual interest but also blend seamlessly into the surrounding environment.

Geometric Shapes and Patterns

Break away from traditional feeder designs and embrace geometry. Think triangles, hexagons, or even intricate patterns carved into the wood. These abstract shapes add a modern flair to your feeder.

Interactive Elements

Elevate your feeder design with interactive elements. A small birdbath integrated into the feeder creates a welcoming oasis. You can also incorporate perches, swings, or even miniature houses to provide additional entertainment for the birds.

Beyond Functionality and Design: Environmental Impact

Bird feeders can have a significant impact on the environment. Consider using recycled materials and opting for feeders made from sustainable sources. You can also choose feeders that minimize waste by offering the right type and amount of food.

By blending functionality, design, and environmental consciousness, you can create a bird feeder that's both beautiful and beneficial. Attract a vibrant array of feathered friends to your yard and create a sanctuary that's as visually appealing as it is practical.

Read More..

Tuesday, November 19, 2024

How to Create Custom Wooden Key Holders That Will Sell Online

Crafting Unique Wooden Key Holders for Online Success

In the world of online marketplaces, standing out from the crowd is crucial. One way to do this is by creating handcrafted items that combine functionality with visual appeal. Wooden key holders are a perfect example of this, offering both practicality and a touch of rustic charm. But how do you create custom wooden key holders that will attract buyers and generate sales? Let's delve into the steps involved.

Identifying Your Niche

Before diving into the design process, it's important to identify your target audience and their preferences. This could involve researching popular key holder designs, analyzing customer reviews, and considering the overall style of your online store. Are you aiming for minimalist designs, rustic farmhouse aesthetics, or something more whimsical? Defining your niche will help you create key holders that resonate with your potential customers.

Choosing the Right Wood

The type of wood you use will significantly influence the final look and feel of your key holders. Consider factors such as:

  • Durability: Hardwoods like oak, maple, and walnut are known for their strength and longevity.
  • Grain Pattern: Walnut and cherrywood offer beautiful, distinctive grain patterns that add visual appeal.
  • Color: Choose woods that complement your desired style. Maple and birch have a light, natural color, while walnut and mahogany offer a rich, darker tone.
  • Availability: Consider the ease of sourcing the wood you choose.

Remember, the wood you select will also impact the price of your key holders, so factor this into your overall cost analysis.

Designing Your Key Holders

Now comes the fun part: creating your custom designs. Consider the following aspects:

  • Shape: Traditional rectangular designs are classic, but you can also explore unique shapes like circles, squares, or even custom silhouettes.
  • Size: Determine the optimal size to accommodate a reasonable number of keys without becoming bulky.
  • Finishing Touches: Consider adding decorative elements like engraved designs, inlaid patterns, or custom lettering. These features can elevate your key holders and make them stand out.
  • Hanger Style: Choose between traditional hook designs, magnetic holders, or even wall-mounted shelves for a more modern look.

Don't be afraid to experiment and play with different combinations. The key is to create designs that are both functional and visually appealing.

Crafting Your Key Holders

Once you've finalized your designs, it's time to start crafting. This involves:

  • Cutting and Shaping: Use appropriate woodworking tools like saws, chisels, and sanders to shape the wood according to your design.
  • Drilling and Finishing: Drill holes for hooks or magnetic attachments, and carefully sand the surfaces to achieve a smooth finish.
  • Finishing Touches: Apply stains, paints, or protective coatings to enhance the natural beauty of the wood and provide a durable finish.
  • Adding Hardware: Install hooks, magnets, or other hardware based on your chosen hanger style.

Take your time during this process to ensure precision and high-quality craftsmanship. Your customers will appreciate the attention to detail.

Marketing and Selling Online

With your handcrafted key holders ready, it's time to bring them to market. Here are some tips for online success:

  • High-Quality Photography: Capture your key holders in natural light, showcasing their intricate details and unique designs.
  • Compelling Descriptions: Highlight the key features, materials, and craftsmanship of each key holder in your product descriptions.
  • Effective Pricing: Research competitor prices, factor in your material costs, and set a price that is competitive and profitable.
  • Social Media Marketing: Use platforms like Instagram, Pinterest, and Facebook to share your products, engage with customers, and build a following.
  • Online Marketplaces: Explore platforms like Etsy, Amazon Handmade, and Shopify to reach a wider audience.

By combining quality craftsmanship, creative design, and effective marketing strategies, you can create custom wooden key holders that resonate with buyers and generate sales online.

Read More..
Coffee Table Designs with Unique Features That Will Stand Out

Coffee Table Designs with Unique Features That Will Stand Out

The coffee table is the centerpiece of your living room, setting the tone for the entire space. It's where you gather with friends, enjoy a cup of coffee, and display your favorite decorative pieces. But a traditional coffee table can feel mundane. If you're looking to make a statement and add a touch of personality to your living room, consider a coffee table with unique features.

Coffee Tables with Hidden Storage

Let’s be real, we all have clutter we want to hide. A coffee table with hidden storage is a practical and stylish solution. You can choose a table with drawers, shelves, or even a lift-top mechanism to reveal a secret compartment. These features allow you to keep your remotes, books, and other essentials organized while maintaining a sleek and uncluttered look.

Drawers for Discreet Organization

A coffee table with drawers provides a simple yet effective way to keep your living room organized. Think of it as a mini-dresser for your living room. Choose from sleek, minimalist designs with flush-mounted drawers, or go for a more traditional look with decorative handles.

Secret Compartments with Lift-Tops

Coffee tables with lift-top features are a modern twist on traditional designs. Simply lift the tabletop to reveal hidden storage space beneath. This space is perfect for hiding away blankets, board games, or any other items you want to keep out of sight but easily accessible.

Coffee Tables with Built-in Features

Beyond just storage, coffee tables can have other built-in features that add functionality and style. Think of features that not only serve a purpose, but also become a conversation starter.

Built-in Wine Coolers

If you're a wine enthusiast, a coffee table with a built-in wine cooler is a must-have. Imagine effortlessly chilling your favorite bottles while entertaining guests, right at your fingertips. These tables come in various styles, from sleek and modern to rustic and farmhouse, allowing you to find the perfect fit for your living room decor.

Integrated Charging Stations

We live in a digital world, and our devices need to be charged. Consider a coffee table with a built-in charging station. These tables often have discreet outlets and USB ports to keep your phones, tablets, and other devices topped up. You can finally ditch the unsightly cords and charger bricks cluttering your coffee table.

Coffee Tables with Unique Materials and Shapes

For those who dare to be different, explore coffee tables crafted from unique materials and shapes. These tables will transform your living room into a personal art gallery.

Reclaimed Wood and Industrial Chic

Coffee tables made from reclaimed wood offer a rustic charm with a touch of sustainability. These tables are often paired with metal accents, creating an industrial chic look that complements contemporary and loft-style spaces.

Marble and Stone Elegance

Marble and stone coffee tables exude elegance and sophistication. Their natural beauty and timeless appeal elevate the ambiance of any living room. You can choose from polished or honed finishes to create the desired look.

Geometric Shapes and Modern Designs

Modern coffee tables often feature geometric shapes and bold lines. Look for tables with circular, triangular, or asymmetrical designs to add visual interest and a touch of contemporary flair to your space.

Tips for Choosing the Perfect Unique Coffee Table

Choosing the perfect coffee table is like finding a piece of art that resonates with you. Here are a few tips to guide your search:

  • Consider your existing décor. Think about the color palette, style, and overall feel of your living room. You want the coffee table to complement your existing furniture and décor.
  • Think about the size of your space. Choose a coffee table that is proportionate to your living room. A large coffee table can make a small room feel cramped, while a small coffee table might get lost in a large space.
  • Don't be afraid to get creative. There are no rules when it comes to choosing a unique coffee table. Be bold, experiment with different materials and shapes, and find a piece that reflects your personal style.

With a little creativity and inspiration, you can find a unique coffee table that will transform your living room into a stylish and functional space. Enjoy the process of discovering the perfect coffee table that speaks to your personal taste and creates a conversation starter in your home.

Read More..

Monday, November 18, 2024

Profitable Wood Sign Projects for Craft Fairs and Etsy

Profitable Wood Sign Projects for Craft Fairs and Etsy

Wood signs are a popular and timeless craft that can be sold at craft fairs and online platforms like Etsy. With a little creativity and the right techniques, you can create beautiful and unique signs that will appeal to a wide range of customers. This article will provide you with some profitable wood sign project ideas, along with tips for success.

Popular Wood Sign Themes

The key to success in selling wood signs lies in choosing themes that resonate with your target audience. Here are some popular themes for wood signs:

Home Decor

Home decor signs are always in high demand, as people love to personalize their living spaces. Some popular home decor themes include:

  • Inspirational quotes
  • Farmhouse style signs
  • Rustic or vintage designs
  • Welcome signs
  • Kitchen signs
  • Bathroom signs
  • Personalized family names

Seasonal and Holiday Themes

Seasonal and holiday signs are a great way to tap into specific events throughout the year. Some popular themes include:

  • Christmas signs
  • Halloween signs
  • Easter signs
  • Valentine's Day signs
  • Thanksgiving signs
  • Summer signs
  • Spring signs

Personalized Signs

Personalized signs are unique gifts that people love to receive. You can offer customization options for:

  • Names
  • Dates
  • Locations
  • Special messages

Occasions and Events

Create signs for specific occasions and events like:

  • Birthdays
  • Weddings
  • Graduations
  • Anniversaries

Profitable Wood Sign Projects

Now, let's delve into some specific profitable wood sign projects that are popular with customers:

Simple and Stylish Signs

These signs are easy to make and sell well because of their versatility:

  • Wooden Circle Signs: These are perfect for inspirational quotes, family names, or minimalist designs.
  • Rectangular Welcome Signs: These are classic and can be customized with different colors, fonts, and designs.
  • Small Decorative Signs: These can be used to add a touch of charm to any room, such as signs with coffee quotes, "Live, Laugh, Love," or "Home Sweet Home."

Trendy Farmhouse Signs

Farmhouse style signs are very popular right now, and here are some ideas:

  • "Gather" Signs: These signs are perfect for kitchens or dining rooms, often featuring a distressed finish and rustic font.
  • Kitchen Signs with Rustic Fonts: Signs with phrases like "Eat, Drink, and Be Merry" or "Life is Better with Coffee" are always in demand.
  • Signs with Floral Elements: Add a touch of farmhouse charm by incorporating florals or botanical patterns into the design.

Personalized Family Signs

These signs make thoughtful gifts for families and are sure to sell well:

  • Family Name Signs with Established Date: These signs are perfect for displaying in entryways or living rooms.
  • Signs with Family Member Names and Birth Dates: These signs are personalized and make a great keepsake.
  • Family Crest or Coat of Arms Signs: For a touch of elegance and heritage, create signs with family crests.

Seasonal and Holiday Signs

These signs are perfect for celebrating specific holidays and seasons:

  • Christmas Signs: Signs with festive phrases like "Merry Christmas" or "Believe" are always popular.
  • Halloween Signs: Create spooky and fun signs for Halloween, with designs like pumpkins, bats, and ghosts.
  • Spring and Summer Signs: Create signs with springtime floral themes or summer beach vibes.

Tips for Successful Wood Sign Sales

To maximize your success in selling wood signs, consider these valuable tips:

  • Research Your Market: Understand current trends and popular themes to appeal to your target audience. Check out Etsy and other online marketplaces to see what's selling well.
  • High-Quality Materials: Use high-quality wood and paints to ensure durability and a professional finish.
  • Unique Designs: Stand out from the competition by offering unique and eye-catching designs.
  • Excellent Photography: Invest in high-quality product photos to showcase your signs beautifully. Good photos will make your signs stand out in a sea of others online.
  • Pricing Strategies: Research pricing for similar signs to determine a competitive price point. Don't undervalue your work, but be mindful of the market.
  • Customer Service: Offer excellent customer service, promptly responding to inquiries and addressing any issues.
  • Marketing and Promotion: Promote your signs on social media platforms, craft fair websites, and through your own website.

Conclusion

Wood signs offer a fantastic opportunity to tap into the growing craft market. By focusing on popular themes, creating high-quality signs, and leveraging effective marketing strategies, you can turn your passion for woodworking into a profitable business. Remember, the key to success lies in providing unique, beautiful, and well-crafted signs that customers will cherish for years to come.

Read More..

Wednesday, November 13, 2024

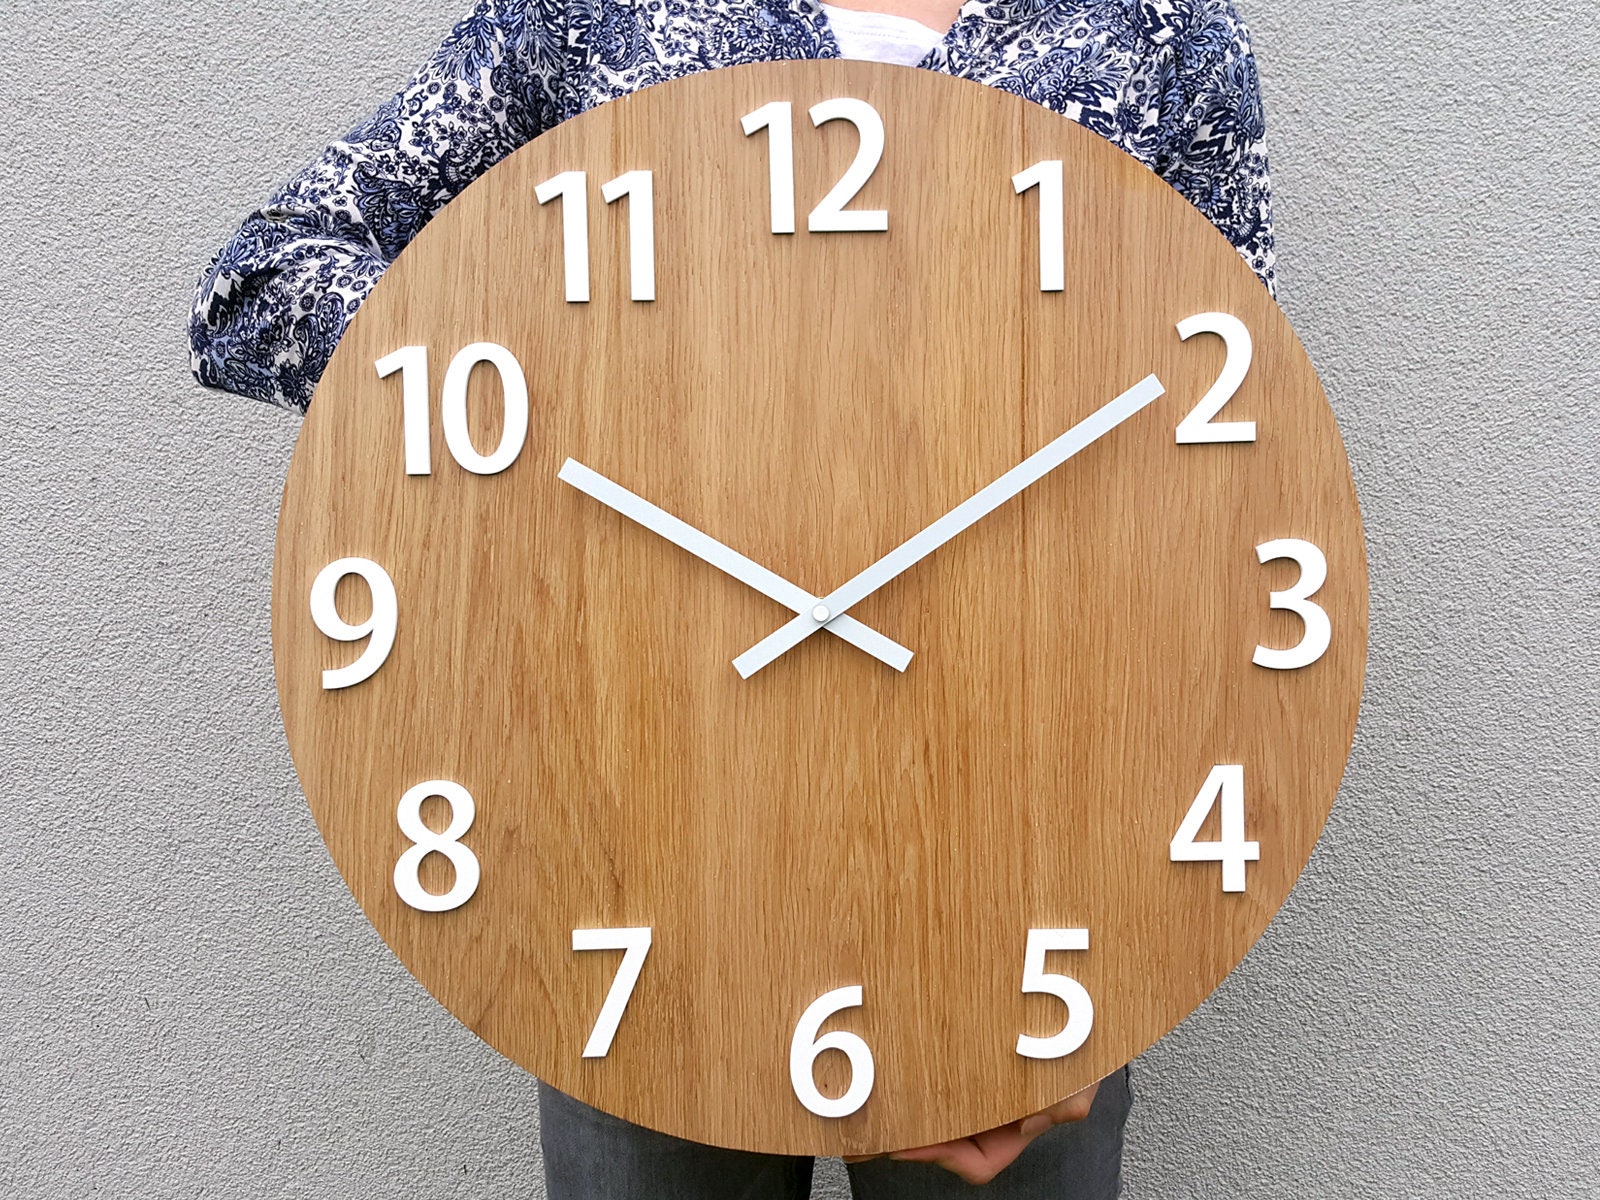
Wooden Wall Clocks with Geometric Designs That Are Easy to Sell

Wooden Wall Clocks with Geometric Designs: A Timeless Appeal for Modern Interiors

In the realm of interior design, where aesthetics intertwine with functionality, wooden wall clocks with geometric designs have emerged as a captivating trend. These timepieces transcend mere utility, becoming focal points that elevate the visual appeal of any space. Combining the warmth and natural beauty of wood with the precision and sophistication of geometric patterns, these clocks offer a timeless elegance that resonates with contemporary sensibilities.

The Enduring Allure of Wooden Wall Clocks

Wooden wall clocks have an inherent charm that stems from their connection to nature. The rich grains and textures of different wood species, such as oak, walnut, and cherry, lend a sense of warmth and authenticity to any room. The handcrafted nature of these clocks adds a personal touch, making them cherished pieces that evoke a sense of history and artistry.

The Appeal of Geometric Patterns

Geometric patterns have captivated designers and artists for centuries, their inherent symmetry and mathematical precision instilling a sense of order and balance. In the context of wooden wall clocks, geometric designs add a layer of sophistication and visual interest, creating eye-catching focal points that complement a variety of interior styles.

The Versatility of Geometric Designs

The beauty of geometric designs lies in their versatility. From simple and minimalist patterns to intricate and complex designs, there is a wide range of styles to choose from. Geometric shapes such as circles, squares, triangles, and hexagons can be combined in countless ways to create unique and eye-catching designs. The choice of color palette further enhances the versatility of geometric designs, allowing for a seamless integration into any color scheme or interior style.

Key Design Considerations for Wooden Wall Clocks with Geometric Designs

To ensure a successful design and optimal marketability, several key considerations should guide the creation of wooden wall clocks with geometric designs:

1. Wood Selection and Finish

The choice of wood plays a crucial role in determining the overall aesthetic of the clock. Consider the grain pattern, color, and texture of different wood species. Popular choices include:

  • Oak: Known for its strength, durability, and distinctive grain pattern, oak lends a classic and sophisticated feel.
  • Walnut: Walnut boasts a rich, dark brown color and a beautiful, swirling grain pattern that adds a touch of elegance and warmth.
  • Cherry: Cherry wood exhibits a reddish-brown hue that deepens over time, creating a warm and inviting ambiance.
  • Maple: Maple wood is known for its light color and fine, tight grain, offering a clean and modern aesthetic.

The finish applied to the wood can significantly impact the final look and feel of the clock. Options include:

  • Natural finish: Allows the natural beauty of the wood to shine through, enhancing the warmth and authenticity of the piece.
  • Stained finish: Adds depth and dimension to the wood, creating a variety of color options to match different interior styles.
  • Polished finish: Creates a smooth, glossy surface that highlights the grain pattern and enhances the overall sophistication of the clock.

2. Geometric Pattern Selection

The choice of geometric pattern is crucial to the overall design aesthetic of the clock. Consider factors such as:

  • Simplicity vs. Complexity: Simple geometric patterns, such as circles or squares, can create a minimalist and modern look, while intricate patterns can add a touch of grandeur and sophistication.
  • Shape and Size: The shape and size of the geometric patterns should be carefully considered to ensure visual balance and harmony within the overall design.
  • Color Palette: The color palette used for the geometric patterns should complement the chosen wood type and finish, creating a cohesive and visually pleasing aesthetic.

3. Clock Mechanism and Design

The clock mechanism is an essential functional component that should be chosen with care. Consider factors such as:

  • Accuracy and Reliability: Opt for a high-quality clock mechanism that ensures accurate timekeeping and long-term reliability.
  • Noise Level: Choose a mechanism that operates quietly to avoid disrupting the peace and tranquility of the room.
  • Style and Aesthetics: The design of the clock mechanism should complement the overall aesthetic of the clock, seamlessly blending with the wood and geometric patterns.

4. Market Research and Target Audience

Thorough market research is essential to identify the target audience and understand their preferences and needs. This research should encompass:

  • Current Trends: Staying abreast of current interior design trends and consumer preferences for wooden wall clocks.
  • Competitor Analysis: Examining the designs and pricing strategies of competitors to identify opportunities for differentiation and innovation.
  • Target Market Demographics: Understanding the age, lifestyle, and aesthetic preferences of the target audience to tailor designs accordingly.

Marketing Strategies for Wooden Wall Clocks with Geometric Designs

Effective marketing strategies are crucial to successfully introduce and sell wooden wall clocks with geometric designs. Key approaches include:

1. High-Quality Product Photography

Professional product photography is essential to showcase the beauty and craftsmanship of wooden wall clocks. High-resolution images that capture the intricate details, textures, and colors of the clock are crucial to attract potential customers.

2. Online Marketplaces and Social Media

Utilize popular online marketplaces such as Etsy, Amazon Handmade, and Shopify to reach a wider audience. Leverage social media platforms such as Instagram, Pinterest, and Facebook to showcase products, engage with customers, and build brand awareness.

3. Collaboration with Interior Designers and Retailers

Collaborating with interior designers and retailers can expand reach and credibility. Provide samples to designers and retailers, allowing them to incorporate the clocks into their design projects and showcase them to their clients.

4. Content Marketing and Storytelling

Create engaging content that highlights the craftsmanship, design, and functionality of wooden wall clocks with geometric designs. Share stories about the inspiration behind the designs, the materials used, and the process of creating these unique timepieces.

5. Targeted Advertising

Utilize targeted advertising campaigns on social media and search engines to reach individuals who are interested in home decor, interior design, and unique timepieces.

Conclusion

Wooden wall clocks with geometric designs offer a captivating blend of aesthetics and functionality, making them a popular choice for modern interiors. By carefully considering design elements, leveraging effective marketing strategies, and embracing the enduring appeal of geometric patterns, businesses can capitalize on this growing trend and create successful products that resonate with contemporary consumers.

Read More..
Install Wood Floating Shelves Without Professional Help

DIY Floating Shelves: A Guide to Install Them Like a Pro (Without the Pro)

Let’s face it, floating shelves are awesome. They're stylish, space-saving, and can instantly upgrade any room in your home. But the thought of installing them yourself might seem daunting, especially if you're not exactly a DIY whiz. Don't worry, I'm here to walk you through it, step by step. You'll be surprised how easy it is to create that sleek, modern look in your home â€" all by yourself!

I’ll be sharing everything I’ve learned from tackling this project myself, including the best materials, essential tools, and all the tips and tricks to make your floating shelves look like they were installed by a professional. Get ready to ditch the old bulky bookcases and embrace the minimalist charm of floating shelves. Let's dive in!

Gathering Your Supplies

Before you start hammering and sawing, you need to gather your materials. Here's your DIY floating shelf shopping list:

  • Wood for Shelves: The type of wood will depend on your style and budget. Popular choices include:
    • Pine (affordable and easy to work with)
    • Maple (strong, with a beautiful grain)
    • Walnut (rich color and stunning grain)
    • Reclaimed wood (unique and eco-friendly)
  • Brackets: These will hold your shelves up. They come in various finishes and styles, from traditional metal to sleek and modern.
    • Hidden Brackets (for a truly floating look)
    • L-Brackets (more traditional and sturdy)
    • Floating Shelf Kits (all-in-one solutions with pre-drilled holes)
  • Screws: Make sure you choose screws that are the right length for your wood and brackets. You’ll need two sets:
    • Screws for attaching brackets to the wall
    • Screws for attaching the shelves to the brackets
  • Wall Anchors: If you're installing your shelves on drywall, wall anchors are essential to prevent them from pulling out. Choose the right size based on the weight of your shelves and the type of drywall you have.
  • Wood Stain or Paint: (Optional) If you want to personalize your shelves, grab some wood stain or paint to match your decor.
  • Sandpaper: Used for smoothing out any rough edges and preparing the wood for staining or painting.
  • Level: Essential for making sure your shelves are straight and even.
  • Measuring Tape: For accurate shelf placement and cutting the wood.
  • Pencil: For marking where to drill holes and cut the wood.
  • Drill: For drilling pilot holes and attaching the brackets to the wall.
  • Stud Finder: To locate the wall studs for the most secure installation.

Choosing the Right Brackets

Your choice of brackets will significantly impact the overall look and feel of your shelves. Here’s a breakdown of the popular bracket styles:

Hidden Brackets:

These are sleek and minimalistic, giving the illusion of a truly floating shelf. However, they can be a little trickier to install and require careful planning. I highly recommend using hidden brackets with a stud finder. The advantage of hidden brackets is that you can choose a larger shelf size, even with heavier items, as long as your wall studs can support it. However, make sure you pick a bracket that has sufficient weight capacity for your needs!

L-Brackets:

L-Brackets are a classic choice, offering strong support and easy installation. They are visible and can be a statement piece, so choose a finish that complements your style. While L-Brackets might not give the illusion of a “floating” shelf, they are a very strong and versatile option.

Floating Shelf Kits:

If you prefer simplicity, consider floating shelf kits. These come with pre-drilled holes and everything you need to install your shelves. They are an excellent option for beginners because they streamline the process. Floating shelf kits can be pricey but offer a solid foundation for your DIY project.

Installing Your Floating Shelves: Step by Step

Let's get down to the nitty-gritty! Follow these steps for a seamless installation:

Step 1: Plan and Measure

Take your time. Measure twice, cut once! Decide where you want your shelves to go, and mark the wall with a pencil. Use a level to make sure the lines are straight. Consider the weight of the items you'll be placing on the shelves and choose brackets that can handle it.

Step 2: Find Wall Studs

Locate the studs in your wall using a stud finder. Remember, you’re going to want to screw the brackets directly into the studs whenever possible to provide maximum support for your shelves. If a stud isn't within reach, use wall anchors for extra support. Don’t skip this step! You want your shelves to stay put for years to come.

Step 3: Drill Pilot Holes

To prevent splitting the wood, always drill pilot holes before attaching the brackets to the wall. Use a drill bit slightly smaller than the screw size you'll be using. If you're using wall anchors, drill pilot holes for those as well.

Step 4: Install the Brackets

Carefully align the brackets with your pencil marks and secure them to the wall using your screws. Use a level to make sure the brackets are straight before you tighten the screws. If you're using wall anchors, insert them into the pilot holes and then screw the brackets into the anchors.

Step 5: Prepare Your Shelves

If you're staining or painting your shelves, do that now. Sand the shelves with sandpaper to create a smooth finish. Let the stain or paint dry completely before moving on to the next step.

Step 6: Attach Shelves to the Brackets

Align the shelves with the brackets, making sure the shelves are level. Screw the shelves to the brackets using the screws provided with your shelf kit or the screws you selected. Congratulations, you’re done! You've successfully installed your floating shelves.

Tips and Tricks for Success

Here are some insider tips to make your DIY floating shelves a masterpiece:

  • Don’t Be Afraid to Ask for Help: If you're unsure about any part of the process, don’t hesitate to ask a friend or neighbor for help.
  • Use a Level: As we said before, leveling is key! Use a level to make sure your shelves are straight and even. It’s better to double-check than to have wonky shelves.
  • Pre-Drill Pilot Holes: Always pre-drill pilot holes to prevent wood from splitting. This simple step makes installation much easier and reduces the risk of damaging your wood.
  • Choose the Right Screws: Selecting the correct screw length is crucial for stability. If your screws are too short, they won’t be strong enough to hold the shelves up. If they’re too long, they could go through the wood and into the wall, which can damage the wall.
  • Use Wall Anchors: If you're installing shelves on drywall, wall anchors are essential. They will prevent the shelves from pulling out of the wall, even under heavy loads.
  • Be Patient: Installing floating shelves is a project that requires patience. Take your time, and don't rush the process. If you take your time, you’re less likely to make mistakes.

Decorating Your Floating Shelves

Now that your floating shelves are installed, it's time to decorate! Let your creativity shine. Here are a few ideas to inspire you:

  • Books: A classic for a reason! Arrange books by color, size, or genre for a visually appealing display.
  • Plants: Add life and vibrancy to your space with potted plants, succulents, or flowers.
  • Artwork: Display framed prints, photos, or your own artwork to create a gallery wall effect.
  • Collectibles: Show off your favorite trinkets, souvenirs, and memorabilia. Create a curated collection that reflects your personality.
  • Candles: Add a touch of warmth and ambiance with scented candles or decorative candles.

Enjoy Your New Shelves!

Congratulations! You've successfully installed your floating shelves without professional help. Stand back and admire your handiwork. Now go on and personalize your shelves with your favorite things! Let me know if you have any questions or need any further assistance.

Read More..
Simple Wood Crafts for Kids: Gifts They Can Make Themselves

Simple Wood Crafts for Kids: Gifts They Can Make Themselves

In a world often filled with digital distractions, there's a growing appreciation for hands-on activities that foster creativity and connection. Wood crafts, with their tactile nature and potential for personalization, offer a fantastic avenue for kids to unleash their artistic spirit while crafting meaningful gifts. This guide explores a range of simple wood crafts that kids can make themselves, fostering their skills, imagination, and joy in giving.

Essential Supplies for Wood Crafting Fun

Before embarking on any wood craft adventure, it's essential to gather the right supplies. This basic toolkit will provide a foundation for a variety of projects:

Wood

  • Scrap wood: This is an economical and sustainable option. Look for smooth, lightweight pieces that are easy for kids to work with.
  • Wooden dowels: These readily available rods come in various sizes and offer a versatile material for building and decorating.
  • Wooden blocks: A classic crafting material, these blocks provide a foundation for imaginative construction and can be decorated with paint, markers, or decoupage.

Tools

  • Scissors: Essential for cutting paper, fabric, and other decorative elements.
  • Craft knife: A sharp knife, used with adult supervision, for precise cutting and shaping.
  • Sandpaper: Smooths rough edges and prepares surfaces for painting.
  • Glue: Craft glue or wood glue is perfect for adhering different materials.
  • Paintbrushes: Various sizes for applying paint, varnish, or stain.

Decorative Materials

  • Acrylic paint: Easy to use and comes in a wide array of colors.
  • Markers: Permanent markers are ideal for writing and detailing.
  • Glitter: Adds a touch of sparkle and whimsy.
  • Fabric scraps: For covering surfaces or creating decorative elements.
  • Beads: For adding embellishments and creating unique patterns.
  • Ribbons and twine: Versatile materials for tying bows, creating accents, and attaching tags.

Simple and Delightful Wood Crafts for Kids

Now that you have your tools ready, let's explore a range of simple wood craft projects that kids will adore creating:

Wooden Coasters

These practical and stylish gifts are perfect for adding a personal touch to a friend's home. Simply cut squares or circles from scrap wood, sand the edges smooth, and decorate them with paint, markers, or decoupage.

Personalized Keychains

Start with wooden dowels or small blocks and cut them into keychain-sized pieces. Kids can then paint, decorate, or add beads to create unique and thoughtful gifts for family and friends.

Animal Figurines

With some basic wood-carving skills (adult supervision required), kids can shape wooden blocks into simple animal figures. They can then paint their creations to bring the animal characters to life.

Wooden Bookmarks

These make excellent gifts for bookworms. Cut small rectangular pieces of wood and decorate them with paint, markers, or even pressed flowers. Kids can personalize their bookmarks with names or meaningful quotes.

Birdhouses and Feeders

For those with a love for nature, building a simple birdhouse or feeder from scrap wood is a rewarding experience. Kids can learn about bird habitats and enjoy watching their feathered friends visit their creations.

Photo Frames

Cut squares or rectangles from scrap wood and sand the edges. Kids can then paint or decorate the frames and add a special photo to make a personalized gift.

Decorative Boxes

Kids can build small boxes using wooden blocks or wooden dowels as sides. They can then decorate the boxes with paint, glitter, or fabric scraps to create charming storage containers.

Painted Wooden Puzzles

Cut a wooden block into puzzle pieces and let kids paint or decorate them with unique designs. These homemade puzzles offer hours of fun for both the creator and the recipient.

Wall Art

Kids can create unique wall decorations by cutting geometric shapes from scrap wood, sanding the edges, and painting them in bold colors. These pieces can be hung individually or grouped together to make a striking display.

Safety Tips for Wood Crafting with Kids

While wood crafts are a delightful way to engage children, safety should always be a top priority. Here are some important safety tips to ensure a positive and safe crafting experience:

  • Adult Supervision: Ensure close adult supervision, especially when using sharp tools like craft knives.
  • Proper Tool Use: Teach kids how to handle tools safely and responsibly.
  • Protective Gear: Encourage wearing safety glasses and gloves, especially when sanding or cutting wood.
  • Work Area: Create a dedicated work area with a clear, clutter-free surface.
  • Ventilation: Ensure adequate ventilation when using paints or varnishes to minimize exposure to fumes.
  • Safe Storage: Properly store tools and materials away from children's reach when not in use.

Tips for Encouraging Kids' Creativity

Making wood crafts a fun and enriching experience goes beyond simply following instructions. It's about nurturing creativity and fostering self-expression. Here are some tips to encourage kids' creativity:

  • Open-Ended Projects: Let kids explore their imagination with open-ended projects that allow for free expression.
  • Variety of Materials: Provide a diverse range of materials, encouraging experimentation and unique combinations.
  • Inspiration Through Nature: Take walks in nature to find inspiration for designs and color palettes.
  • Collaboration: Encourage kids to collaborate with each other, sharing ideas and techniques.
  • Celebrate Success: Recognize and celebrate every effort, big or small. Every creation is a step toward building confidence and a love for the craft.

Wood crafts offer a wonderful opportunity for kids to connect with nature, develop their skills, and create meaningful gifts. By providing a safe and supportive environment, encouraging creativity, and celebrating their efforts, you can help kids unlock their inner artist and experience the joy of crafting with wood.

Read More..
Rustic Jewelry Box: A Charming and Natural Woodworking Project

Rustic Jewelry Box: A Charming and Natural Woodworking Project

Hey there, fellow woodworkers and crafty souls! Are you looking for a fun and rewarding woodworking project that will add a touch of rustic charm to your home? Look no further than building a rustic jewelry box! This project is perfect for beginners, and with a little creativity, you can personalize it to your heart's content.

Imagine this: a beautiful, handcrafted box made from reclaimed wood or salvaged materials, with unique knots and imperfections that tell a story. It's a piece that you'll treasure for years to come, and a perfect gift for someone special.

So, grab your tools, gather your materials, and let's get started on this delightful journey of crafting a rustic jewelry box that will be the envy of all your friends!

Choosing Your Wood

The beauty of a rustic jewelry box lies in the character of the wood. You can use reclaimed wood, salvaged lumber, or even buy rough-cut boards from a lumberyard. The key is to choose wood with unique features that add to its rustic charm.

Here are some ideas for wood types to consider:

  • Reclaimed Barnwood: Adds a timeless, weathered look with its distinctive knots, cracks, and variations in color.
  • Driftwood: Offers a unique and organic feel, with its bleached and weathered appearance.
  • Walnut: Provides a rich, dark color and beautiful grain patterns.
  • Cherry: Displays a warm, reddish-brown tone that develops a deep patina over time.
  • Maple: Offers a lighter color and captivating grain patterns, perfect for creating a rustic yet elegant look.

Remember, even if you're working with wood that has imperfections, embrace them! They add to the story of your jewelry box and make it truly unique.

Planning and Design

Before you start cutting and assembling, it's crucial to plan out your design. Consider these factors:

  • Size: How much jewelry do you want to store in the box? Choose a size that fits your needs, but not too large or too small.
  • Shape: Will it be a simple rectangular box or something more elaborate? You can even try a heart shape or a circular design.
  • Lid: Do you want a simple hinged lid, or a more elaborate design like a sliding lid or a removable top?
  • Interior: Think about compartments or trays you might want to incorporate for organizing jewelry.
  • Finish: Will you leave the wood natural, or apply a stain, oil, or varnish for protection and a different aesthetic?

Sketch out your ideas and create a detailed plan before you begin cutting. This will help ensure that your project flows smoothly and avoids any surprises later on.

Tools and Materials

You'll need the following tools and materials to get started:

  • Wood: Choose your desired wood type based on your design and preferences.
  • Wood Glue: A high-quality wood glue is essential for strong and durable bonds.
  • Measuring Tape: Ensure precise measurements for accurate cuts.
  • Pencil: Mark your cuts and designs on the wood.
  • Handsaw or Circular Saw: Cut the wood to your desired size and shape.
  • Drill and Drill Bits: Create holes for hinges and other hardware.
  • Screwdriver: Secure hinges, handles, and other components.
  • Sandpaper: Smooth out any rough edges and prepare the wood for finishing.
  • Clamps: Secure wood pieces during assembly and gluing.
  • Hinges: Choose hinges appropriate for the size and weight of the lid.
  • Handles or Knobs: Add a touch of style and functionality to your box.
  • Finish (Optional): Stain, oil, varnish, or wax to protect and enhance the wood's natural beauty.

Construction Process

Now, let's break down the construction process step-by-step:

1. Cutting the Wood

Using your plan as a guide, carefully cut the wood to the dimensions you have determined. Remember to leave a little extra material for sanding and finishing. You can use a handsaw for more precise cuts or a circular saw for larger pieces. If you're working with reclaimed wood, you might need to cut around knots or imperfections.

2. Sanding the Wood

Once you have all your pieces cut, sand them thoroughly with sandpaper to achieve a smooth and even surface. Start with coarser sandpaper and gradually work your way down to finer grits. Sanding not only improves the appearance but also helps ensure a smooth and even finish.

3. Assembling the Box

Now comes the fun part! Carefully align the sides of the box and apply wood glue to the joints. Use clamps to hold the pieces firmly in place while the glue dries. Make sure the corners are tight and the box is square. You can also use screws or dowels for additional strength, depending on your design.

4. Attaching the Lid

Attach the hinges to the lid and the box using screws. Make sure the hinges are aligned and that the lid opens and closes smoothly. You can also use decorative hinges for a more rustic look.

5. Adding Handles or Knobs

If you're incorporating handles or knobs, drill holes in the lid or the sides of the box, and secure them with screws. Choose handles or knobs that complement the style of your jewelry box.

6. Finishing the Box

The final step is finishing the box to protect it and enhance its beauty. You can choose from a variety of options like:

  • Natural Finish: Leave the wood natural to showcase its natural beauty and rustic charm. You can apply a light coat of oil or wax for protection.
  • Stain: Apply a stain to change the color of the wood and enhance its grain patterns. You can choose from a wide range of stains to achieve your desired look.
  • Varnish: Apply a varnish for a protective coating that will also enhance the wood's natural beauty.

Let the finish dry completely before handling your new rustic jewelry box. You can also personalize the finish by adding a touch of creativity. For example, you can carve your initials or a decorative design into the lid.

Personalizing Your Rustic Jewelry Box

The fun doesn't end with the basic construction! Here are some ideas to personalize your rustic jewelry box and make it truly unique:

  • Incorporate Metal Accents: Use metal accents like hinges, handles, and corner protectors to create a more industrial or vintage look.
  • Add a Leather Strap: Attach a leather strap to the box to create a unique and rustic closure mechanism.
  • Embellish with Carvings: Add decorative carvings to the lid or sides of the box, showcasing your artistic flair.
  • Use Unique Hardware: Seek out vintage or antique hardware like hinges, locks, and handles to give your box a special touch.
  • Decorate with Fabric: Line the inside of the box with a fabric that complements the wood's color and character.

Get creative and let your imagination run wild! The sky's the limit when it comes to personalizing your rustic jewelry box.

Enjoy Your New Rustic Jewelry Box

Congratulations! You've successfully crafted a beautiful and unique rustic jewelry box that will surely bring a touch of charm to your home. It's a perfect place to store your precious jewelry and a reminder of your woodworking skills.

Don't forget to share your creation with friends and family and inspire them to try their hand at this rewarding project. And who knows, maybe you'll even spark a passion for woodworking in them!

Read More..
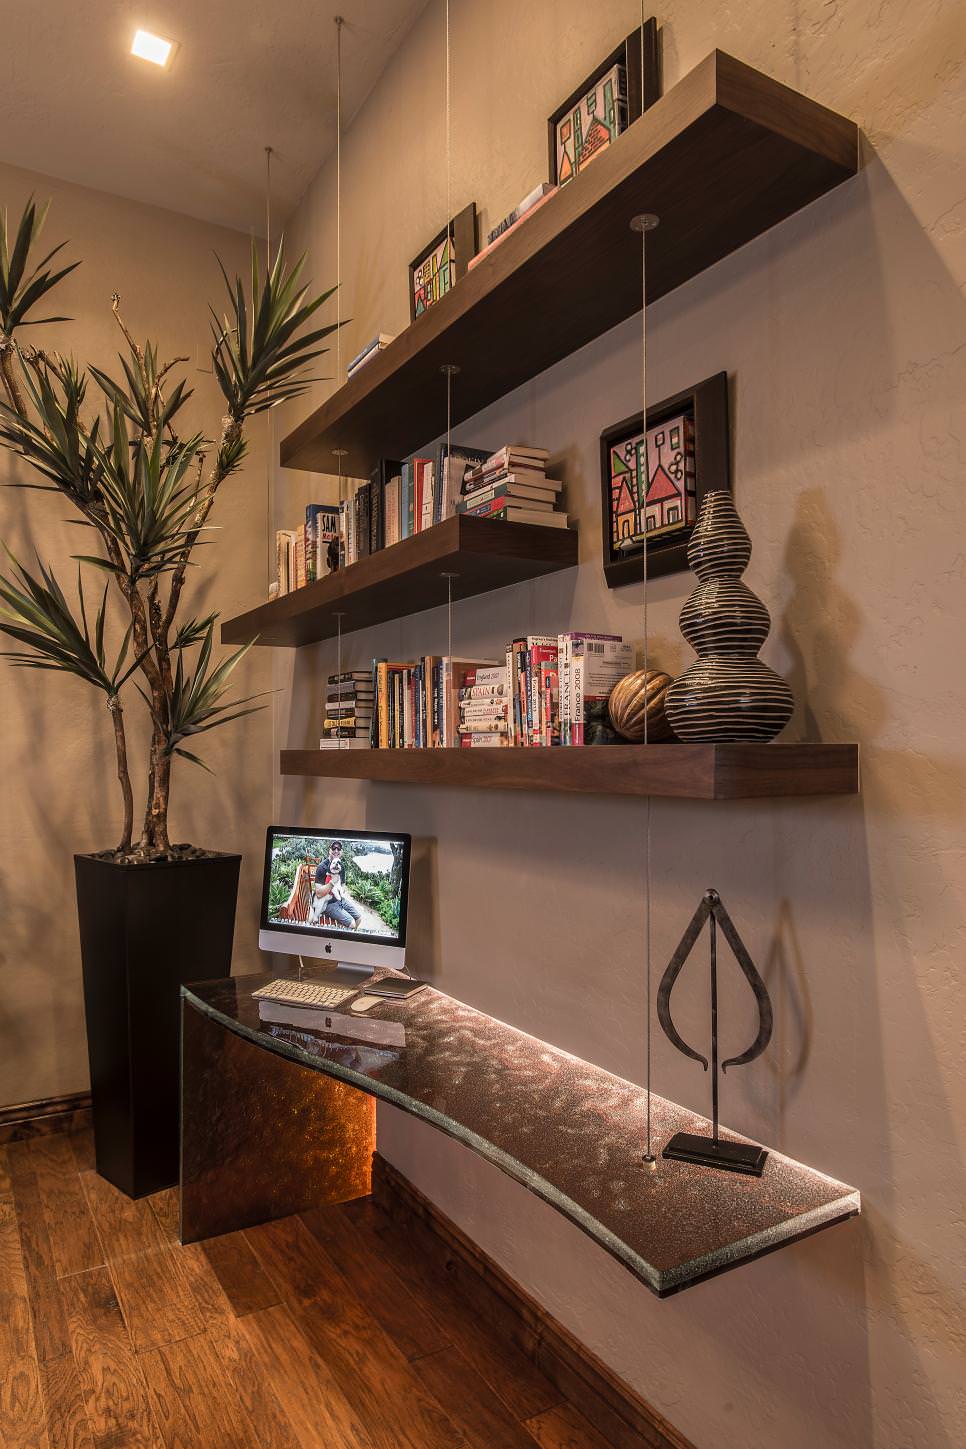
Creative Wood Floating Shelf Designs for Every Style

Creative Wood Floating Shelf Designs for Every Style

Tired of the same old boring shelves? Want to add a touch of personality and style to your space? Floating shelves are the perfect solution! Not only are they a great way to showcase your favorite things, but they're also super versatile and can be customized to fit any style. So ditch the bulky cabinets and let's explore some creative wood floating shelf designs that will leave you inspired!

The Power of Wood

Let's talk about woodâ€"it's the ultimate material for creating eye-catching floating shelves. Why? Because it's incredibly versatile, durable, and warm to the touch. Plus, wood comes in a million different shades and grains, making it easy to find the perfect match for your decor. Whether you love the rustic charm of reclaimed wood, the sleek elegance of walnut, or the bright vibrancy of maple, there's a wood species out there for every taste.

Floating Shelves: A Modern Must-Have

Okay, so you're on board with the wood, but what makes floating shelves so special? Think about itâ€"they appear to effortlessly float on the wall, creating a minimalist look that's both modern and functional. No bulky brackets or supports to obstruct your view. Just clean lines, a touch of warmth, and a whole lot of style.

Get Creative with Your Design

Now that we've established the basics, let's get creative! Here are some awesome floating shelf designs to inspire you:

Geometric Wonders

Love clean lines and angular shapes? Consider incorporating geometric elements into your floating shelves. Think hexagonal shelves, triangular shelves, or even shelves that create a zig-zag pattern across the wall. You can even mix and match different shapes for a truly unique look.

Rustic Charm

Embrace the natural beauty of wood with rustic-inspired floating shelves. Choose reclaimed wood with knots, cracks, and character. Don't be afraid to leave the wood unfinished or apply a light stain to enhance its natural beauty. These shelves will add warmth and a touch of vintage charm to any space.

Industrial Edge

For an edgy, industrial vibe, opt for metal brackets and pipes paired with reclaimed wood shelves. The contrasting textures and materials create a cool and modern look. You can even add a touch of industrial chic with exposed brick walls or metal accents.

Playful Curves

Break away from the norm with curved floating shelves. These shelves add a whimsical touch to any space. You can find pre-made curved shelves or even DIY your own using plywood and a jigsaw. For a bold statement, choose a contrasting paint color for the shelves.

Stacked and Styled

Go big or go home! Create a statement wall with multiple stacked shelves. You can choose a variety of sizes and shapes to add visual interest. This is a great way to display a large collection of items, from books and plants to artwork and souvenirs.

Floating Shelf Hacks for Every Room

Now, let's talk about how you can use floating shelves in every corner of your home:

Living Room Bliss

Floating shelves are perfect for displaying your favorite books, decorative objects, or even a small houseplant. Use them to create a cozy reading nook or to add a touch of personality to your entertainment center.

Kitchen Essentials

Make the most of your kitchen space with floating shelves. Use them to store spices, cookbooks, or even to display your favorite mugs or plates. Opt for open shelves for a more airy and inviting feel.

Bedroom Sanctuary

Add a touch of elegance to your bedroom with floating shelves. Use them to display framed photos, candles, or even a small collection of jewelry. They're also perfect for showcasing your favorite books or decorative items.

Bathroom Serenity

Keep your bathroom essentials organized and within easy reach with floating shelves. Use them to store towels, toiletries, or even small plants for a touch of greenery.

Office Inspiration

Create a functional and stylish workspace with floating shelves. Use them to display your favorite books, stationery, or even a small collection of motivational quotes. They're also a great way to store files and organize your desk.

DIY Floating Shelves: Let's Get Crafty!

Ready to take on a DIY project? Making your own floating shelves is easier than you think. You'll need basic woodworking tools, like a saw, drill, and sandpaper. Here are some tips for success:

  • Choose your wood carefully. Consider the type of wood, its color, and its grain.
  • Measure twice, cut once. Accuracy is key for a professional-looking finish.
  • Use strong brackets or supports to secure your shelves.
  • Sand your shelves smooth for a polished look.
  • Finish your shelves with stain, paint, or a sealant for protection and a beautiful finish.
  • Floating Shelves: A Timeless Trend

    Floating shelves aren't just a fleeting trendâ€"they're a timeless design element that will add character and functionality to your home for years to come. With a little creativity, you can easily transform a blank wall into a stylish and personalized display area. So, go ahead, unleash your inner DIY enthusiast and create some show-stopping floating shelves that will make your home truly stand out!

    Read More..

    Tuesday, November 12, 2024

    Make a Coffee Table at Home: Step-by-Step DIY PDF

    Build Your Own Coffee Table: A DIY Guide for the Home Decor Enthusiast

    Hey there, fellow DIYer! Feeling the urge to give your living room a refresh but don't want to break the bank? You're in luck! Building your own coffee table is a surprisingly achievable project that can be as simple or as intricate as you like. Not only will you save some serious cash, but you'll also have the satisfaction of creating something truly unique and personalized.

    Ready to dive in? Let's grab our tools and get building!

    Choosing Your Style

    The first step is envisioning your perfect coffee table. Do you dream of a sleek, modern design with clean lines? Or maybe you prefer a rustic farmhouse aesthetic with reclaimed wood? Perhaps a minimalist design with a touch of industrial charm speaks to you? Whatever your vision, take some time to browse for inspiration. Look at pictures, visit furniture stores, or even sketch out your ideas on paper.

    Here are some popular coffee table styles to get your creative juices flowing:

    • Mid-Century Modern: Think sleek lines, tapered legs, and natural wood finishes.
    • Industrial: Exposed metal, reclaimed wood, and a touch of grunge are the hallmarks of this style.
    • Farmhouse: Rustic charm with distressed wood, chunky legs, and a farmhouse-style finish.
    • Contemporary: Clean lines, minimalist designs, and modern materials like acrylic or metal.
    • Traditional: Classic elegance with ornate details, carved legs, and rich wood finishes.

    Gathering Your Supplies

    Once you've settled on a style, it's time to gather your supplies. This will depend on the design you've chosen, but here's a list of common materials and tools you'll likely need:

    Materials:

    • Wood: This could be plywood, planks, or even reclaimed wood. Choose a wood that complements your style and desired finish.
    • Legs: You can find ready-made legs at hardware stores or craft stores, or you can build your own with wood or metal.
    • Fasteners: Screws, nails, wood glue, and brackets will be essential for assembling your table.
    • Finish: Consider using paint, stain, varnish, or a combination of finishes to achieve your desired look.
    • Hardware: If you're adding shelves or drawers, you'll need the appropriate hardware, such as drawer slides, hinges, and handles.

    Tools:

    • Saw: A circular saw, jigsaw, or hand saw will be needed to cut your wood.
    • Drill: For drilling pilot holes and attaching fasteners.
    • Screwdriver: A variety of screwdrivers will be helpful for different screw sizes.
    • Sandpaper: Sandpaper is crucial for smoothing out surfaces and preparing them for finishing.
    • Measuring Tape: Essential for accurate measurements and cutting.
    • Level: Ensures your table is level and stable.
    • Clamps: For holding pieces of wood together while you work.
    • Safety Gear: Always wear safety glasses, gloves, and a dust mask when working with power tools and wood.

    Building Your Coffee Table

    Now comes the fun part: building your masterpiece! This is where your chosen design will come into play. Here's a general guide to the construction process, but feel free to adapt it based on your specific plan:

    1. Cut the Wood

    Start by cutting your wood to the required dimensions for the tabletop and legs. Use a saw, making sure to measure twice and cut once. You can use a jig saw or a scroll saw to create more intricate shapes if your design calls for it.

    2. Assemble the Tabletop

    Depending on your design, you may need to join multiple pieces of wood together to create the tabletop. Use wood glue, screws, or brackets for secure bonding. If using plywood, you might need to reinforce the tabletop by adding bracing or cross-supports.

    3. Attach the Legs

    Pre-drill holes for your legs to prevent the wood from splitting. Use wood glue and screws to attach the legs to the tabletop. Make sure to position the legs evenly and at the right angle. You can use a level to ensure your table is sitting straight and stable.

    4. Sand and Finish

    Sand the entire surface of your table, starting with coarse-grit sandpaper and working your way to finer grits for a smooth finish. This will remove any rough edges or imperfections. Once you're satisfied with the sanding, apply your chosen finish, whether it's paint, stain, varnish, or a combination. Follow the manufacturer's instructions for application and drying times.

    5. Add Additional Details (Optional)

    If your design includes shelves, drawers, or any other additional details, now is the time to incorporate them. Attach shelves using brackets and screws, and install drawer slides and hardware.

    Finishing Touches

    Congratulations! You've built your own coffee table! Take a moment to admire your work. Now, let's add those final touches that will make it truly yours.

    • Decorate with Accessories: Add a stylish vase, a stack of books, a cozy throw blanket, or a decorative tray to complete the look.
    • Personalize with a Unique Touch: Consider adding a personal touch, like a monogram, a painted design, or a unique finish.
    • Enjoy Your Creation: Relax and enjoy the fruits of your labor!

    Tips for Success

    Here are some tips to make your coffee table project even more successful:

    • Plan Ahead: Thoroughly sketch out your design, including the dimensions and materials.
    • Use High-Quality Materials: Investing in quality wood and fasteners will ensure your table is durable and lasts for years to come.
    • Take Your Time: Don't rush the process. Accuracy and patience will lead to a better result.
    • Ask for Help: If you're not comfortable using power tools, ask a friend or family member for assistance.
    • Have Fun: Building a coffee table is a rewarding experience. Enjoy the creative process and don't be afraid to experiment!

    And there you have it! You've successfully built your own coffee table. It's a project that can be as simple or as elaborate as you like, and it's a great way to add a touch of personality to your home. Now, go forth and create!

    Read More..
    Build a Unique Squirrel Box with Free Plans

    Build a Unique Squirrel Box with Free Plans

    Hey there, fellow nature enthusiasts! Are you tired of watching squirrels scamper around your yard, wreaking havoc on your bird feeders? Well, I've got just the thing for you - a unique squirrel box that will not only keep those furry little bandits entertained but also provide them with a cozy home. And the best part? It's completely free! I'm going to walk you through the process step by step, so even if you're a complete DIY newbie, you can build this awesome squirrel box.

    Why Build a Squirrel Box?

    You might be wondering, why bother building a squirrel box? It's simple. Squirrels are essential to our ecosystem. They help with seed dispersal, aerate the soil, and provide food for other animals. But, let's be honest, they can also be a bit of a nuisance when they're raiding your bird feeders. Building a squirrel box is a win-win! You provide them with a safe and comfortable place to call home while also keeping them away from your bird feeders.

    Materials You'll Need

    Don't worry, you won't need a million tools or fancy materials. You can build a great squirrel box with just a few basic things:

    • 1x6 or 1x8 pine boards (around 8 feet long)
    • 1/2" plywood (a small sheet is enough)
    • Wood screws (various sizes, 1 1/2" and 2 1/2" are good to have)
    • Wood glue
    • Weatherproof paint or stain (optional, but recommended for longevity)
    • Measuring tape
    • Saw (circular saw or handsaw)
    • Drill
    • Screwdriver
    • Clamps (optional)

    Step-by-Step Instructions

    Alright, let's get building! I've designed this squirrel box with a fun twist, adding a small platform for them to hang out and enjoy the view. This is going to be a great squirrel hangout spot!

    Step 1: Cut the Pieces

    First, we'll cut our boards into the following pieces (measurements are in inches):

    • Sides: 2 pieces - 12" x 16"
    • Front: 1 piece - 12" x 16"
    • Back: 1 piece - 12" x 16"
    • Top: 1 piece - 12" x 16"
    • Bottom: 1 piece - 12" x 16"
    • Platform: 1 piece - 10" x 10"
    • Platform Support: 2 pieces - 4" x 8"

    Use your saw to carefully cut these pieces to size. Remember to always wear safety goggles when working with power tools!

    Step 2: Assemble the Box

    Now, let's put the box together. We'll start with the sides, front, and back. Using wood glue and screws, attach the sides to the front and back. You'll have a nice rectangular shape.

    Next, attach the bottom panel to the bottom of the box. Secure it well with screws and glue.

    Step 3: The Top and the Entrance

    For the top, we'll create a hinged lid for easy access. Before attaching the top, cut a 4" x 4" square in the front panel for the entrance. You can use a jigsaw or a hand saw to make this opening.

    Now, attach the top to the box using hinges. Make sure the hinges are strong enough to handle the weight of the lid.

    Step 4: The Platform

    For the platform, we'll use the 10" x 10" plywood piece. Attach the platform support pieces (4" x 8") to the underside of the platform, ensuring they're centered. This will create a lip for the platform.

    Now, carefully attach the platform to the inside of the box, about 3 inches from the top. Make sure it's securely attached with screws and glue.

    Step 5: Finishing Touches

    Almost there! The last step is to paint or stain your squirrel box. This not only adds a nice look but also protects the wood from the elements.

    Choose a weatherproof paint or stain that's suitable for outdoor use. You can be creative with the color, and even add a personal touch with stencils or decorations.

    Setting Up Your Squirrel Box

    You've built a beautiful squirrel box! Now, it's time to find the perfect spot for it.

    • Choose a safe location. Place it in a shady spot, away from direct sunlight and heavy rain. A tree or a fence can provide good shelter.
    • Make it accessible. Make sure the box is easy for squirrels to reach.
    • Be patient. It might take a while for squirrels to discover their new home, but they'll eventually find it!

    Providing for Your New Squirrel Tenants

    Now that you have a happy squirrel family living in your yard, you might want to think about providing some treats. Here are some ideas:

    • Nuts: Acorns, walnuts, pecans, and peanuts are squirrel favorites.
    • Seeds: Sunflower seeds, pumpkin seeds, and millet are great options.
    • Fruits: Apples, bananas, and berries are delicious treats.

    Just be sure to keep food fresh and avoid giving them processed or salty snacks. You want to provide healthy and natural treats for your furry neighbors.

    Enjoy Your Squirrel Box

    And there you have it! You've built a unique and cozy squirrel box that will surely attract those playful creatures. Remember to keep an eye on your new tenants and enjoy watching them scamper around and enjoy their new home.

    Happy building and happy squirrel watching!

    Read More..
    How to Craft a Squirrel Den Box in Easy Steps

    Building a Squirrel Den Box: A Simple Guide to Encouraging Fuzzy Friends

    Hey there, nature lovers! Ever wanted to provide a cozy home for those adorable, bushy-tailed squirrels scampering around your backyard? Building a squirrel den box is a fantastic way to attract these playful creatures and contribute to their well-being. It's a surprisingly easy project, even for beginners. Let's dive in and build a haven for our furry neighbors!

    Planning Your Squirrel Den Box

    Before we get our hands dirty, let's plan out the details of our squirrel haven. Consider these factors:

    Location, Location, Location!

    Squirrels are naturally cautious creatures, so finding the right spot for your den box is crucial. Choose a location that:

    • Offers protection from predators like cats and hawks.
    • Provides ample shade during hot weather.
    • Is close to trees or branches for easy access.
    • Is at least 10 feet off the ground, ideally higher for extra security.

    Remember, a squirrel's den should be a sanctuary, not a target for unwanted attention.

    Choosing the Right Materials

    You'll need sturdy and weather-resistant materials to create a long-lasting den box. Here's what you'll need:

    • Wood: Use untreated, rough-sawn lumber like cedar, pine, or redwood. These woods are naturally resistant to decay and insects. Avoid pressure-treated wood, as it contains chemicals harmful to squirrels.
    • Screws: Choose galvanized screws, which are rust-resistant and won't weaken over time.
    • Metal flashing: This will protect the entrance from the elements.
    • Paint (optional): Use non-toxic, outdoor paint if you want to add a splash of color.

    Design Considerations

    Think about the squirrels' needs when designing your den box. Here are some important points:

    • Entrance size: Make the entrance hole about 4 inches in diameter. This will allow squirrels to enter easily but keep out larger animals.
    • Interior space: Aim for a minimum interior space of 12 inches wide by 12 inches deep by 12 inches high. This will provide ample room for nesting and raising young.
    • Ventilation: Add a few small holes on the sides of the box to allow for air circulation.
    • Roof overhang: A slight overhang on the roof will help protect the entrance from rain and snow.

    Building the Den Box

    Now, for the fun part! Let's build that cozy haven for our bushy-tailed friends. Follow these steps:

    1. Assemble the Base and Walls

    Start by cutting the wood for the base and walls according to your design. Use screws to securely attach the walls to the base, creating a rectangular box. Make sure the bottom is solid to support the weight of the nesting material.

    2. Create the Entrance

    Cut a circular opening (4 inches in diameter) on one of the walls to create the entrance hole. This opening should be high enough off the floor to prevent young squirrels from falling out.

    3. Install the Roof

    Cut two pieces of wood for the roof and attach them to the top of the box, creating a slight overhang. You can use hinges to create a removable roof for easier access. This will also allow you to inspect the box and clean it out periodically.

    4. Add Ventilation

    Drill several small holes on the sides of the box for ventilation. These holes will allow fresh air to circulate, preventing the den from becoming stuffy and damp.

    5. Protect the Entrance

    Attach a piece of metal flashing over the entrance hole to prevent rain and snow from getting inside. You can also add a small piece of wood, creating a "lip" to help direct water away from the entrance.

    6. Paint (Optional)

    If you're feeling creative, you can paint the box with non-toxic, outdoor paint. Choose a color that blends in with the surroundings. However, keep in mind that squirrels prefer natural colors and may be less likely to use a brightly colored box.

    Installing the Squirrel Den Box

    We're almost there! Now let's get that cozy den box in place. Follow these tips:

    • Secure Mounting: Secure the den box to a sturdy tree branch using heavy-duty straps or brackets. Make sure the box is securely mounted to prevent it from falling.
    • Height: Mount the box at least 10 feet off the ground for maximum safety.
    • Orientation: Position the entrance hole so that it faces away from prevailing winds and heavy rainfall.
    • Initial Placement: Don't be surprised if it takes some time for squirrels to discover and accept the new den box. Don't be discouraged if you don't see any activity right away. Keep it in place and the squirrels will eventually find it.

    Enhancing the Den Box

    Once your squirrel den box is in place, you can add some extra touches to make it even more inviting.

    • Nesting Material: Place a small amount of nesting material in the box, such as shredded paper, dry leaves, or soft grasses. Squirrels will add their own materials to create a cozy nest.
    • Food and Water: Provide a nearby food source like a bird feeder or a small dish of nuts. You can also add a shallow dish of water for drinking and bathing.
    • Observation: Keep a safe distance when observing the squirrels in their den. Don't disturb them or approach too closely, as they might abandon the box if they feel threatened.

    Enjoy Your New Squirrel Neighbors!

    Congratulations! You've created a cozy haven for those playful squirrels and are contributing to their well-being. Enjoy watching them scamper around and explore their new home. Remember, building a squirrel den box is a rewarding experience that connects you with nature and allows you to observe these fascinating creatures up close.

    Happy squirrel watching!

    Read More..
    How to Build a Large Birdhouse for Wild Birds and Pets

    Building a Large Birdhouse for Wild Birds and Pets

    Providing shelter for birds, whether wild or domesticated, is a rewarding endeavor. A large birdhouse can offer a safe and comfortable haven for a variety of species, promoting biodiversity and enhancing your backyard habitat. This comprehensive guide will walk you through the process of building a spacious birdhouse, ensuring both aesthetic appeal and functional suitability.

    Materials and Tools

    Before embarking on the construction, gather the necessary materials and tools:

    Materials:

    • Weather-resistant plywood or cedar boards (1/2-inch thickness)
    • Exterior-grade paint or stain (optional)
    • Roofing shingles or metal roofing
    • 1-inch diameter dowel rod (for perches)
    • Screws (1-inch and 2-inch lengths)
    • Heavy-duty hinges (for the roof)
    • Weatherstripping or caulk
    • Birdhouse entrance hardware (optional, for bird safety)

    Tools:

    • Circular saw or jigsaw
    • Drill with various drill bits
    • Measuring tape
    • Level
    • Hammer
    • Screwdriver
    • Safety glasses
    • Pencil

    Planning and Design

    Before cutting any wood, meticulously plan the dimensions and design of your birdhouse. Consider the following factors:

    Bird Species:

    The size and shape of the birdhouse should be appropriate for the intended occupants. Research the preferred nesting habits of the birds you wish to attract. For example, a large birdhouse suitable for wood ducks would be significantly different from one designed for bluebirds.

    Location:

    Choose a location that provides ample sunlight and protection from predators. The birdhouse should be placed at least 5 feet above ground and away from dense foliage that could obstruct predator access. Consider attaching it to a sturdy tree or post.

    Ventilation and Drainage:

    Adequate ventilation is crucial for preventing moisture buildup and mold growth. Incorporate ventilation holes on the sides or roof of the birdhouse. A slight slope on the roof will aid in water drainage.

    Construction Steps

    Follow these step-by-step instructions to build a large birdhouse:

    1. Cut the Base and Sides:

    Using your chosen wood, cut the base, two side panels, and a back panel to the desired dimensions. The base should be wider than the side panels to provide a stable platform.

    2. Assemble the Base and Sides:

    Attach the base to the two side panels using screws. Securely connect the back panel to the sides, forming a rectangular box. Ensure all joints are tight and secure.

    3. Create the Entrance:

    Cut a circular or rectangular entrance hole on one of the side panels. The size of the entrance will depend on the type of bird you are targeting. Use a jigsaw or circular saw to create a clean and smooth opening.

    4. Install the Perches:

    Attach 1-inch diameter dowel rods to the interior walls of the birdhouse as perches. Ensure they are positioned away from the entrance to prevent blocking access.

    5. Build the Roof:

    Construct the roof using two pieces of plywood or cedar. The roof should be slightly larger than the base to provide overhang. Attach hinges to one side of the roof, allowing it to open for cleaning and inspection.

    6. Add Roofing Material:

    Cover the roof with roofing shingles or metal roofing for protection against rain and wind. Use screws to secure the roofing material in place.

    7. Install Weatherstripping:

    Apply weatherstripping or caulk around the entrance hole and the roof edges to seal gaps and prevent drafts. This will also help keep out moisture.

    8. Paint or Stain (Optional):

    If desired, apply a coat of exterior-grade paint or stain to the birdhouse for added protection and aesthetics. Choose colors that blend in with the surrounding environment or create a bold statement.

    9. Install Birdhouse Hardware (Optional):

    Consider installing birdhouse hardware for increased bird safety. This may include predator guards, a squirrel baffle, or a wire mesh cage around the entrance. These features help prevent unwanted access from squirrels, cats, or other predators.

    Maintenance and Care

    Regular maintenance is essential for ensuring the longevity and safety of your birdhouse:

    • Clean the birdhouse annually or more frequently if needed. Remove any nesting materials and debris to prevent the buildup of harmful parasites and diseases.
    • Inspect for damage. Repair any broken or cracked parts to maintain structural integrity and prevent leaks.
    • Repaint or stain as needed. Keep the exterior of the birdhouse looking fresh and protected.
    • Monitor bird activity. Observe the birdhouse for signs of distress or illness in the occupants.

    Conclusion

    Building a large birdhouse is a fulfilling project that can bring joy to both you and the feathered inhabitants of your backyard. By following these comprehensive guidelines, you can create a comfortable and safe haven for a variety of bird species. Remember to choose materials that are weather-resistant, design the birdhouse with the needs of the target birds in mind, and maintain it regularly for a long-lasting sanctuary. Enjoy the rewarding experience of observing birds raise their young in your handcrafted masterpiece.

    Read More..
    How to build a grill gazebo with a relaxing outdoor lounge

    Build a Grill Gazebo with a Relaxing Outdoor Lounge

    Imagine this: the aroma of grilling delights fills the air as you relax in a comfortable lounge, enjoying the company of friends and family. This idyllic scene is within your reach when you build a grill gazebo with a relaxing outdoor lounge. A grill gazebo offers a dedicated space for outdoor cooking and dining, protected from the elements and enhanced by a cozy lounge area. Let's embark on this exciting project together!

    Planning Your Grill Gazebo and Lounge

    Before you dive into construction, take some time to plan your grill gazebo and lounge. Consider the following:

    Size and Location

    Determine the size of your gazebo and lounge area based on your needs and the available space in your yard. Factor in the size of your grill, seating capacity, and desired walking space. Choose a location that provides shade, privacy, and easy access to utilities.

    Materials

    Select durable materials for your gazebo, like treated lumber, metal, or vinyl. Choose a roofing material that provides shade and protection from rain. For the lounge area, consider comfortable furniture like wicker chairs, a plush sofa, or a hammock.

    Design and Style

    Think about the overall aesthetic you want to achieve. Do you prefer a rustic, modern, or tropical vibe? Choose a design that complements your home and landscaping. Select furniture and accessories that align with your chosen style.

    Building the Gazebo

    Once your plan is set, it's time to build the gazebo. Here's a step-by-step guide:

    Foundation

    Lay a solid foundation for your gazebo using concrete piers or a wooden deck. Ensure it is level and strong enough to support the structure.

    Frame

    Construct the frame using treated lumber or metal posts. Secure the posts to the foundation and build a roof frame.

    Roof

    Install the roofing material of your choice, such as metal panels, shingles, or canvas. Ensure proper ventilation and drainage.

    Walls

    If you desire walls, install them using lattice panels, privacy screens, or curtains. Consider using insect netting for added protection.

    Creating the Lounge Area

    Once your gazebo is complete, create a comfortable lounge area. Here are some tips:

    Furniture

    Choose comfortable seating options that complement your gazebo's style. Add a coffee table for drinks and snacks.

    Lighting

    Install ambient lighting, like string lights or lanterns, to create a warm and inviting atmosphere.

    Decor

    Add personal touches like throw pillows, blankets, and plants to create a cozy and inviting space.

    Enjoy Your Grill Gazebo and Lounge

    After all your hard work, it's time to enjoy your grill gazebo and relaxing outdoor lounge. Invite friends and family over for a barbecue, enjoy a quiet evening with a good book, or simply relax and soak up the sunshine.

    Your grill gazebo with a lounge area will become a favorite spot for outdoor living and entertaining. You've created an oasis where you can relax, cook delicious meals, and create lasting memories with loved ones.

    Read More..
    How to Design and Build a Custom Cold Frame

    Designing and Building a Custom Cold Frame

    A cold frame is a simple yet versatile structure that extends the growing season, allowing gardeners to start seeds early in the spring, protect tender plants during the fall, and even grow certain crops year-round in milder climates. By harnessing the power of the sun and trapping heat, a cold frame provides a controlled environment that promotes healthy plant growth.

    While commercially available cold frames are readily available, building your own offers a unique opportunity to customize the design to perfectly suit your garden's needs and aesthetic preferences. This article will guide you through the process of designing and constructing a custom cold frame, covering everything from materials to construction techniques.

    Design Considerations

    Before diving into the construction, carefully consider these design elements to create a cold frame that best suits your requirements.

    Size and Shape

    The size of your cold frame will depend on your gardening goals. A small cold frame, around 3 feet by 4 feet, is suitable for starting seeds or protecting a few delicate plants. Larger cold frames, up to 6 feet by 8 feet, offer more space for growing a wider variety of vegetables or even housing overwintering plants.

    The shape is mostly a matter of personal preference. Rectangular cold frames are the most common, offering ample space and ease of construction. However, you can also explore curved or even triangular designs for a more unique look.

    Orientation

    The orientation of your cold frame is crucial for maximizing sunlight exposure. Ideally, position your cold frame facing south to receive the maximum amount of sunlight throughout the day. If your space is limited, east or west orientation can also work well.

    Material Selection

    Choose materials that are durable, weather-resistant, and easy to work with. Common choices include:

    • Wood: Offers warmth, natural insulation, and ease of construction. Cedar, redwood, and pressure-treated lumber are good choices for durability.
    • Metal: Provides a sleek, modern look and is highly durable. Aluminum or galvanized steel are excellent choices for resisting rust.
    • Plastic: Lightweight, affordable, and easy to clean. PVC or polycarbonate panels are great options for covering the top of the cold frame.
    • Glass: Offers excellent light transmission but can be heavy and breakable. If you choose glass, ensure it's tempered for safety.

    Ventilation

    Proper ventilation is crucial for preventing excessive humidity and maintaining optimal temperature inside the cold frame. Consider incorporating ventilation features like:

    • Adjustable lids: Allow for precise control of airflow and temperature regulation.
    • Vents: Can be built into the sides or bottom of the cold frame to provide passive ventilation.
    • Automatic vents: Can be added to open and close based on temperature changes, ensuring optimal air circulation.

    Insulation

    Insulation is particularly important during colder months to maintain optimal temperatures. Consider adding:

    • Styrofoam: Affordable and readily available, providing excellent thermal insulation.
    • Fiberglass insulation: Offers a higher level of insulation but can be more expensive.
    • Wool batting: Natural, breathable, and sustainable, offering good thermal insulation.

    Construction Process

    Once you have your design finalized, you can start assembling your cold frame. Here's a step-by-step guide:

    1. Prepare the Site

    Select a level and sunny spot for your cold frame. Clear the area of any debris and weeds. If necessary, prepare the soil by adding compost or other amendments to improve drainage and fertility.

    2. Build the Frame

    Cut and assemble the frame using your chosen material. For a wooden frame, use screws, nails, or joinery techniques to create a sturdy and stable structure. Ensure the corners are square and the frame is level before proceeding.

    3. Attach the Base

    Attach the base of your cold frame to the frame. For a wooden base, use treated lumber to resist rot and moisture damage. Secure the base to the frame using screws or nails. Ensure the base is level and flush with the ground. If using a metal frame, you might consider a metal base for a uniform look.

    4. Install the Cover

    Choose a cover that allows maximum light transmission while providing adequate protection from the elements. Glass, polycarbonate, or even recycled plastic sheeting are good options. Attach the cover to the frame using hinges, clips, or a sliding mechanism. Make sure the cover sits securely and opens easily for access and ventilation.

    5. Add Ventilation

    Incorporate ventilation features to regulate temperature and humidity inside the cold frame. This could involve installing adjustable lids, vents, or automatic vent systems.

    6. Apply Insulation (Optional)

    If you plan to use your cold frame during colder months, consider adding insulation. This is particularly important if you live in a region with harsh winters. Install the insulation material between the walls and the cover.

    7. Finish the Project

    Once your cold frame is assembled, add any finishing touches, like painting the wood or adding a sealant to protect the materials. To enhance aesthetics and functionality, consider building a small shelf inside the cold frame to hold seeds, tools, or other items.

    Maintenance and Care

    To ensure your cold frame functions optimally and lasts for years to come, follow these maintenance tips:

    • Regularly clean the glass or plastic cover to maximize sunlight penetration and prevent dirt buildup.
    • Inspect the frame and cover for damage and make repairs promptly to prevent leaks or structural weaknesses.
    • Ventilate the cold frame regularly to prevent excessive humidity and mold growth.
    • Monitor temperatures inside the cold frame and adjust ventilation accordingly to maintain optimal growing conditions.
    • Remove debris and weeds from the cold frame and surrounding area to maintain a clean and healthy environment for your plants.

    Building a custom cold frame is a rewarding project that allows you to extend your growing season and enjoy fresh produce even during colder months. By following these design and construction guidelines, you can create a durable, functional, and aesthetically pleasing cold frame that will enhance your gardening experience for years to come.

    Read More..
    Squirrel Den Box Designs for Any Skill Level

    Squirrel Den Box Designs for Any Skill Level

    Embrace the delightful world of backyard wildlife by building a cozy squirrel den box. These charming structures offer a safe haven for these furry acrobats, enriching your outdoor space with playful activity. From simple designs for beginners to intricate models for seasoned builders, there's a perfect squirrel den box waiting to be crafted. Let's embark on this enriching journey, transforming your yard into a squirrel paradise!

    Beginner-Friendly Squirrel Den Boxes

    Start your squirrel den box journey with a simple and accessible design. These projects are ideal for those new to woodworking or eager to try their hand at a fun and rewarding craft. Choose a basic box design, focusing on creating a safe and comfortable space for the squirrels.

    Wooden Box With an Entrance Hole

    This straightforward design involves creating a simple wooden box with a carefully measured entrance hole. Select sturdy plywood or cedar for durability, and measure the box dimensions to ensure a comfortable fit for the squirrels.

    • Choose a box size that’s at least 12" x 12" x 12".
    • Cut a circular entrance hole with a diameter of approximately 4-5 inches, ensuring it's positioned high on one side of the box.
    • Create a roof with a slight overhang for protection from the elements.
    • Recycled Container Den Box

      Embrace a sustainable approach by repurposing a sturdy container as a squirrel den box. This eco-friendly option not only utilizes recycled materials but also adds a unique touch to your backyard.

      • Clean and prepare a plastic or metal container, ensuring it's free of sharp edges or hazardous materials.
      • Cut a circular entrance hole on one side, adjusting the size based on the container’s dimensions.
      • Secure the lid or create a roof for weather protection.
      • Intermediate-Level Squirrel Den Boxes

        Venture into more intricate designs, adding embellishments and extra features to create a truly enchanting squirrel haven. These intermediate-level projects offer a challenge while allowing you to express your creativity and woodworking skills.

        Double-Chambered Squirrel Den Box

        Elevate your design with a double-chambered squirrel den box, providing additional space and privacy for the squirrels. This design incorporates two separate chambers, each with its own entrance hole.

        • Utilize sturdy wood like cedar or pine for the box's frame.
        • Create two distinct chambers, each measuring about 12" x 12" x 12".
        • Position the entrance holes on opposite sides of the box, allowing for easy access and separation between the chambers.
        • Squirrel Den Box with a Viewing Window

          Experience the joy of observing squirrels in their natural habitat with a den box featuring a viewing window. This design provides a safe and unobstructed glimpse into the squirrels' world, fostering a sense of connection with these charming creatures.

          • Choose a clear plastic or acrylic sheet for the window, ensuring it's strong enough to withstand the elements.
          • Cut a rectangular opening on the side of the box, fitting the window securely in place.
          • Position the window strategically for a clear view of the interior, allowing you to observe the squirrels without disturbing their privacy.
          • Advanced Squirrel Den Box Designs

            Challenge yourself with advanced squirrel den box designs, incorporating intricate woodworking techniques and functional elements. These projects demonstrate your woodworking expertise and create an exceptional habitat for your furry friends.

            Multi-Level Squirrel Den Box

            Expand your design skills with a multi-level squirrel den box, offering increased living space and opportunities for exploration. This project requires careful planning and execution, ensuring a secure and functional structure.

            • Utilize durable and weather-resistant wood for the box's frame.
            • Construct multiple levels, each providing a separate sleeping or nesting area.
            • Connect the levels with ramps or ladders, allowing squirrels to move freely between them.
            • Squirrel Den Box with a Feeding Platform

              Create a complete squirrel sanctuary with a den box incorporating a feeding platform. This all-in-one design provides both shelter and sustenance, encouraging squirrels to frequent your backyard.

              • Attach a sturdy platform to the front of the den box, ensuring it's accessible to the squirrels.
              • Position the platform to provide a clear view of the surroundings, allowing squirrels to feel safe while feeding.
              • Create a small railing around the platform to prevent squirrels from falling.
              • Tips for Attracting Squirrels to Your Den Box

                Once your squirrel den box is complete, there are several steps you can take to entice these playful creatures to make it their home. Consider these simple tips to maximize your chances of welcoming a furry resident:

                • Location is Key: Position the den box in a shaded and protected location, preferably near a tree or dense foliage. Avoid placing it in direct sunlight or areas exposed to strong winds.
                • Consider Height: Mount the den box at least 6-8 feet above ground, allowing squirrels to access it safely and reducing the risk of predators.
                • Make it Inviting: Line the interior with soft bedding material such as shredded newspaper or straw, providing a comfortable nesting space.
                • Offer Treats: Scatter seeds, nuts, or fruits near the den box to attract squirrels and introduce them to their new sanctuary.
                • Building a squirrel den box is a rewarding and fulfilling experience. Whether you're a beginner or an experienced woodworker, these designs offer a range of options to suit your skill level and creativity. Enjoy the process of crafting a cozy haven for these delightful creatures, adding a touch of wild charm to your backyard!

    Read More..